Inviting people to your event
Last updated: August 28, 2025
While Videosync is not a dedicated email marketing application, it provides built-in invitation tools that are especially useful when you need controlled access to your event. When you send invitations through Videosync, each recipient receives a unique participation link, making it easy to restrict access to a specific group of invitees without requiring passwords or additional authentication.
Under Share category, you can share your event using different external channels or invite your attendees directly through their email.
To invite attendees to your event using email, go to Invite settings under Share category.
Modify invitation email
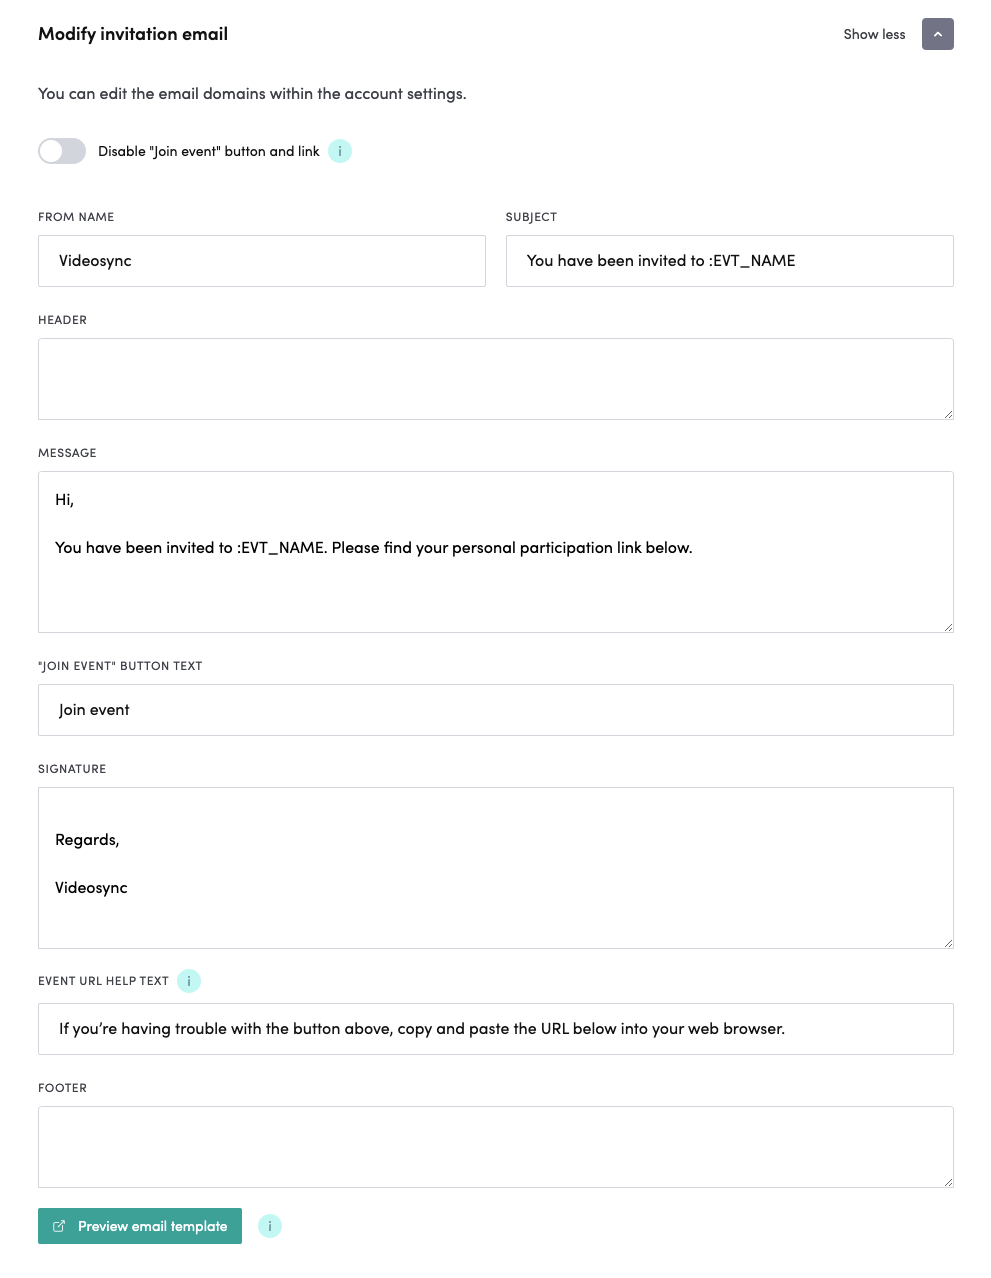
In these settings, you can modify the settings of invitation emails. You can change the sender, email subject, message (with separate header & footer), Join button’s text, signature and help text. There is also a button to preview the invitation email to see how it looks in the participants’ email.
Send as a calendar invitation
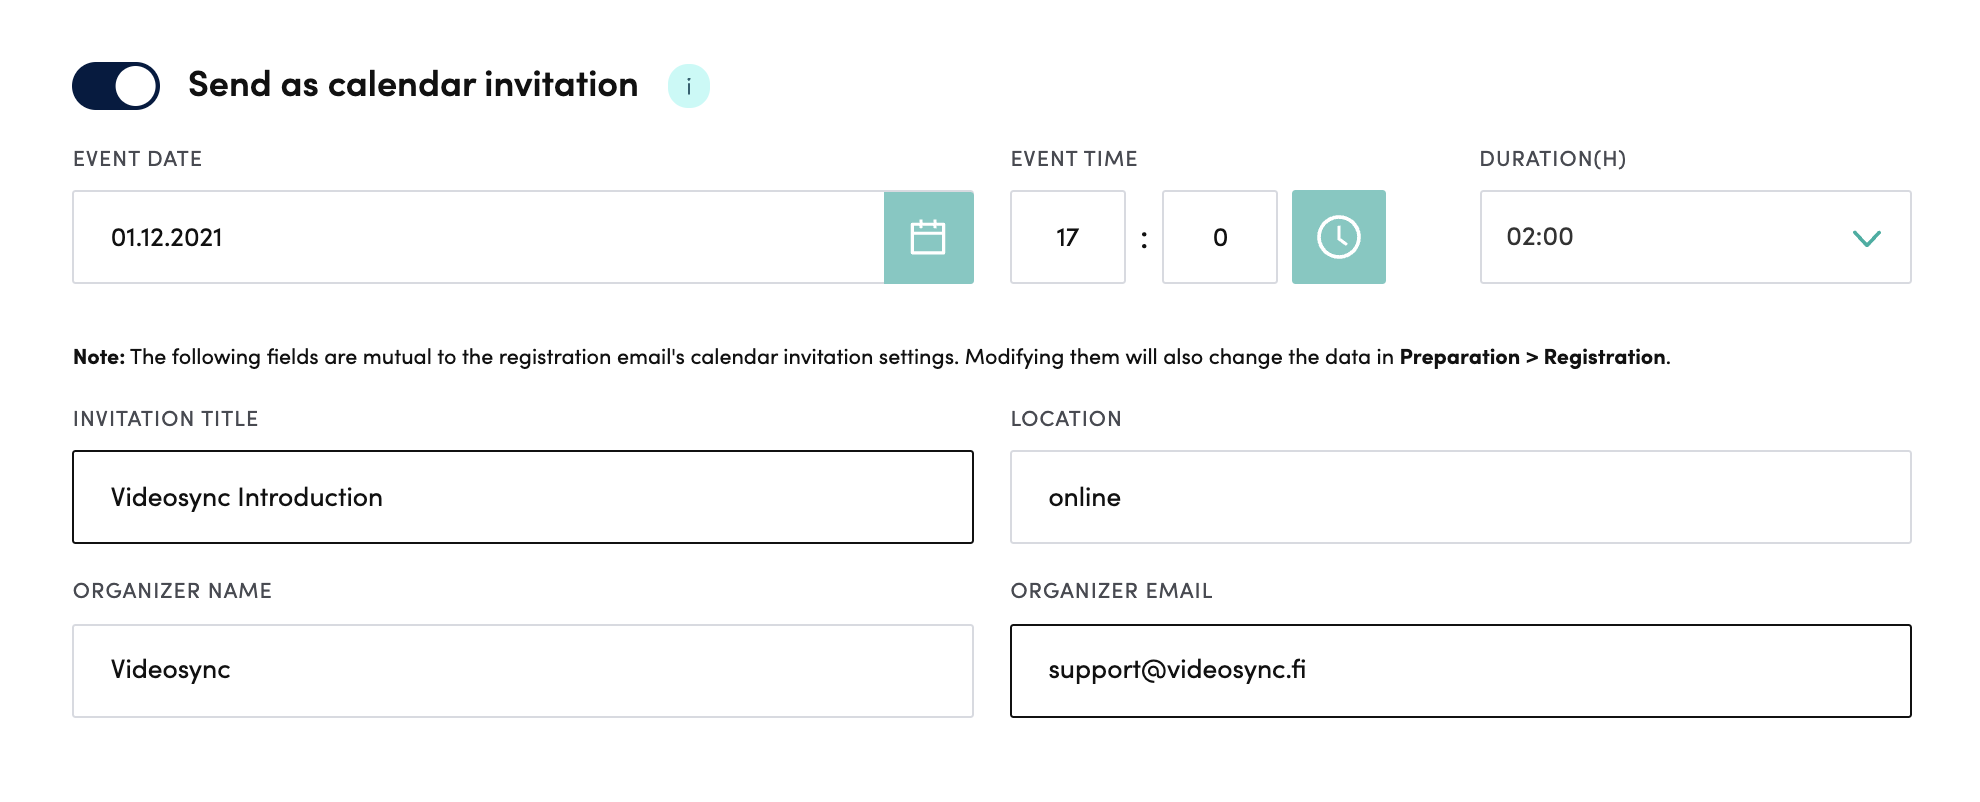
You can include a calendar invitation to your email message. If you need to, you can change the event dates and calendar title, location and organizers.
Add participants & send invitations
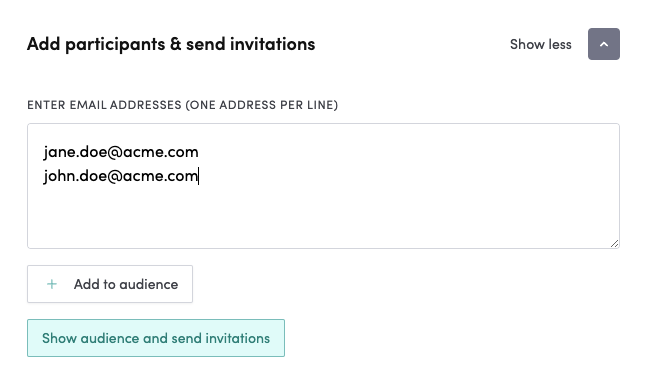
You can add email addresses to the textarea as shown above. To add the registrants, click the Add to audience button.
If you want see the registrants or/and send invitations, click Show audience and send invitations. The list contains all registrations, which you can modify and remove.
To send the invitation email, select all or certain ones from the leftmost column and click Send Emails to selected.

Sending invitations to a specific participant group
You can also send emails to only some of the participants.
Here, for example, a custom registration field Location is used to filter out the participants that have selected On-site as their location in the registration form.
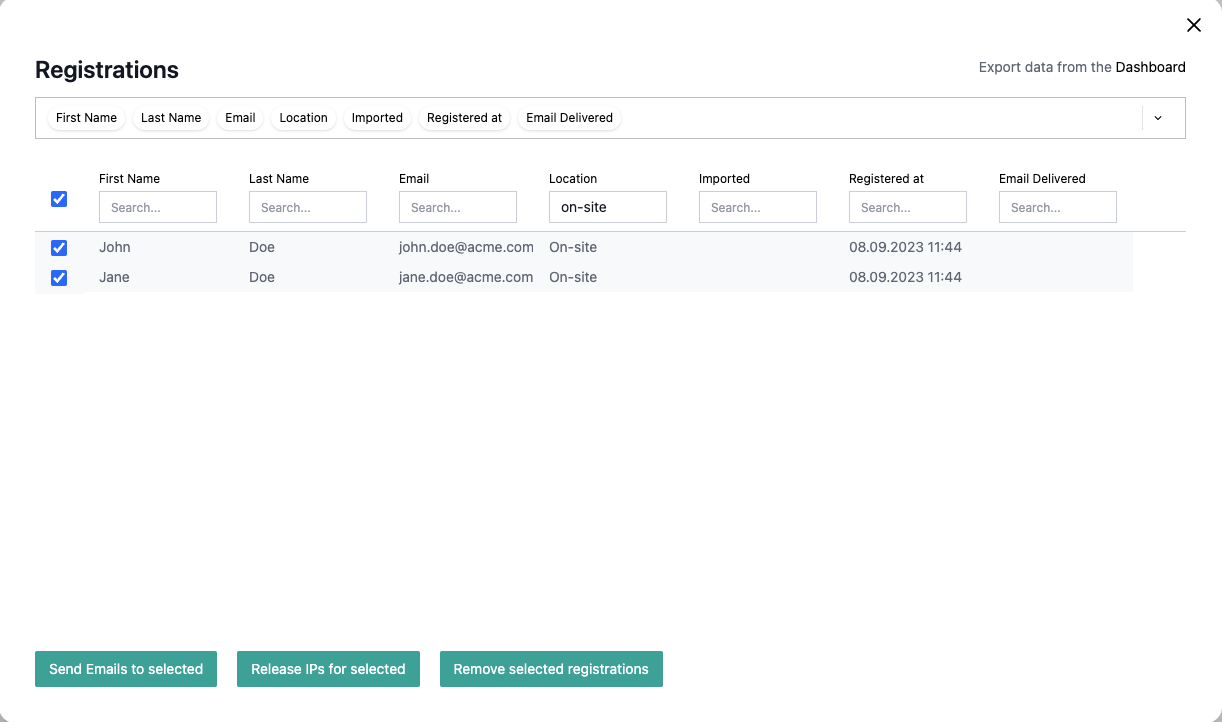
First, you filter out the participants by using the input field on the top of the Location column to show only on-site participants, then select all from the leftmost column and click Send Emails to selected.
Tip: You can also edit the invitation email beforehand to personalize it for on-site users using the Modify invitation email settings before sending.
Can't find what you're looking for?
Our AI assistant is here to help you find the information you need.